Ball Jointed Doll Makeover

All about my doll makeover, makeup, repaint, ooak, dress, accessories

DIY and Crafts

Simple and easy DIY craft

Beautifull Places

Heaven On Earth! Some Travelling Story, Idea, Review, Tips

Culinary

Yuummm.. everyone love's foods. So here is culinary review from me, and some of super quick and easy recipe

Ball Jointed Doll Makeover

Because I LOVE Doll

Showing posts with label Nail Nail Nail. Show all posts

Saturday, March 15, 2014

Etude House Look At My Nail Shine #SPK001 ~ Swatch

Every people has own style, and own favourite color, in my experience selling nail polish, a lots of people likes sheer polish because it's shine the nails but look natural.

Sheer polish to review today is Etude House Look At My Nail Shine. I choose #SPK001, it's look a like soft pink color in the bottle


This nail polish have thin result, I put 2 coat and as you can see in the picture, the gap between pink part and white part of my nail still seen.

Etude House Look At My Nail Shine #SPK001 is suitable for natural shine effect, if you want full cover color like creme type nail polish, you need to put it more than 3 coats.


Wednesday, March 5, 2014

Etude House Sweet Recipe Ice Cream Nail ~ Swatch

Spring seasons is coming up, the best color to spring season is pastel color, colourfull but sweet, so I think the best nail polish to wear is Sweet Recipe Ice Cream From Etude House.


Cute bottle with sweet pastel color, looks a like green tea ice cream and lemon ice cream \(´▽`)/


I choose green and yellow color, like leaves and little yellow flower. Color code for green is GR701 and for yellow is BE101 (why Etude House using BE? BE is code for beige color, its more suitable if the code YL, I think.. >.< )


And the result in my hand...


So fresh, sweet and adorable >.<


Its like I'm holding 2 small ice cream hahaha (◦ˆ⌣ˆ◦)


Etude House Sweet Recipe Ice Cream type is creme nail polish, thick texture and medium wide brush. You only need to put twice to fully cover your nails

Product Name : Etude House Sweet Recipe Ice Cream Nail
Rating : 9/10
Recommended : Yes
This product can be purchased at MY SHOP 

Thursday, February 13, 2014

Etude House If Story Nail Kit IV : If The White Witch Melt With Love ~ Swatch

Heloooo dear.. 2 posts in a row about nail polish ^.^ today's post is review of  "If Story Nail Kit IV" from Etude House

This nail polih kit is manufactured by Etude House at Christmas 2012, it's already a year passed, and in 2013, Etude House no longer produce Christmas Nail Polish Kit.


Colors i choose is "If The White Witch Melt With Love", which represent the atmosphere of a Snowy White Xmas.


This is the description on the boxes..


The content of the If Story Nail Kit IV is 2 pieces of nail polish, each 10ml. The first is the large white and silver glitter nail polish, like a snow. And the second nail polish is pale purple creme polish with colorful glitter


The results of the first nail polish, this is a a big glitter top coat, there is hexagonal shape glitter and fritter glitter. Glitter top coat is perfect combined with metallic and shimmer nail polish


This is the results of the second nail polish, pale purple color, toned with multicolored glitter and variety of glitter sizes, this type of nail polish is quite unique, make your nails like quail eggs hahaha ^^


Product Name : Etude House If Story Nail Kit IV : If The White Witch Melt With Love
Rating : 8/10
Recommended : Yes
This product already discontinued

Sunday, February 9, 2014

Etude House Juicy Cocktail Gradation Nails #1 Screw Driver ~ Swatch

Its been a while since last post about nail polish swatch, today i'm gonna review about the best seller nail polish from Etude House

Etude House Juicy Cocktail Gradation Nails is mini nail polish kit contains 3pcs nail polish, 4ml each bottle.
All 3pcs nail polish have same theme color, so we can make gradation color on the nails easily.
 

The colors I choose is "Screw Driver", it's fresh orange color, I think.. the name is more suitable if Orange Juice or Orange Squash hahaha


Let's look at the color of nail polish in this kit :


The first nail polish is the base, the color is sheer peach orange, the color pigment is thin, because it's a base

The second is for color gradation, the color is fresh orange and there is little glitter, apply only at the nail tip, to make gradation effect

The third is a glitter top coat, the color is red-orange, apply only at the tip of the nail, I love the color of this nail polish ^^


Step 1 :


Step 2 :


Step 3 :


Voilaa!! Your nails look so juicy ^^~


This is the final result,
You can put a clear top coat to make it shiny and long lasting


The price of this nail polish is cheap, and i got 3 pieces of nail polish, I think this nail polish kit is very interesting. What I don't like is.. to make ​​gradation nail effect takes a long time.

Put one layer of nail polish, wait until dry, and then put another layer etc..
To make your nail polish dry faster, you can blow with small portable fan, mini nail dryer or blow dryer. I sell nail dryer at my shop IDR 45.000 hahaha


Product Name : Etude House Juicy Cocktail Gradation Nails
Rating : 8/10
Recommended : Yes
This product can be purchased at MY SHOP

Thursday, December 26, 2013

Fimo Nail Art Tutorial

Today is tutorial time ^^
Its been a while since the last nail art tutorial, today I'm gonna explain about Basic Nail Art using Fimo

What you need is : Sliced Fimo, Nail Polish, Glue, Rhinestone (optional)


For glue, I'll explain about 3 kinds of glue, there are : Deco Glue / All Purpose Glue, Top Coat / Clear Nail Polish, Nail Glue.
 

- Deco Glue / All Purpose Glue : The result is long lasting, but need a long time to dry, it doesn't suit for nail art in your real nail
- Top Coat / Clear Nail Polish : The easy way to stick fimo into your nail, but its not long lasting
- Nail Glue : The result is long lasting, I recomended using nail glue. Make sure your fimo slice is as thin as possible.


First Steps : Color your nail with nail polish, I using fake nail because it easier for me to take a photos ^^


Second Steps : Wait until nail polish 100% dry, put glue in desired area, remember to wait a few seconds before attaching something on to glue


Thrid Steps : Attach fimo on glue area, press gently, until all fimo surface is completly stick on your nail, you can blow a little air using small fan, nail dryer, mini blow dryer to make it quickly dried.


Fourth Steps : Decorate with some rhinestones (you can skip this part if you don't have rhinestones), remember to wait a few seconds before attaching your rhinestones on to glue, too wet glue are gonna damage the bottom of rhinestones, and the rhinestones will loose the bling bling effect.


Wait until glue 100% dried, cover with Clear Nail Polish or Top Coat to make it shiny and long lasting (remember, don't put top coat on the top of rhinestone)
... And its done ^^

Saturday, December 14, 2013

My Old Nail Art

Warning :  This Post Maybe Will Be Bandwidth Killer ( 26 pcs Image)

Inspired by the previous post about "Old Decoden", I made ​​a similar post about the "Old Nail Art". For flashback about nail art I've ever made

I like to color my nails with nail polish since I was at High School, after seeing the Japanese nail art magazine in 2007, I was surprised because there are so many variations of the Japanese Nail Art . Since then, I was started to learn nail art on my own.

This is first nail art I made, Gradation Color Nail Art by using glitter polish.


In 2008 I was joined the nail art forum in the largest communities forum in Indonesia, and I got the bullied by seniors there, my heart is very sad, but the good news is... I met my best friend. Her name is Jilz, she is feels sympathy for me because i got bullied by seniors, and then she contacted me, we talked a lot about everythings and we became a best friends since then 'till this day *hug*

I don't care anymore with that nail art forum, the important thing is.. I found my best friend, one sincere friend are better than 1000 fake friends ^ ^

Back to the original topic ..
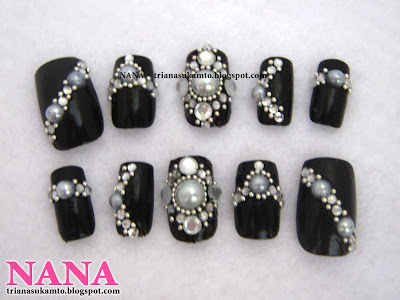
I find cheap fake nails at a local accesories store, and decorate it with lace, ribbon and rhinestone.


This is the result of my first nail art painting using acrylic paint.


Nail art using lace and ribbons.


Some results of nail art using acrylic paints.


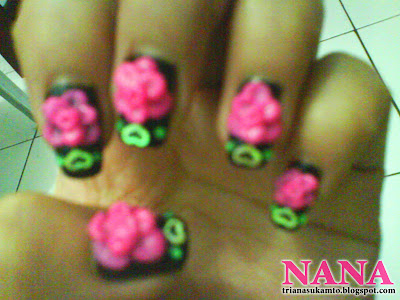
In the Decoden post i've said that i was attend in Clay Seminars, then I made ​​a small flowers and I put on the fake nails.


I saw the 3D acrylic nail art tutorial on Youtube and I really wanted to try it, then I bought acrylic nail art materials on Ebay. It was my first import experience, luckily the seller was very patient answering my newbie questions hahaha. And here's the results of my first 3D acrlylic flowers.


This Nail Art theme is "Cool Love" hahaha


Simple French manicure


Spring sakura flower with my photo in 2008, no makeup + low resolution camera >.<


Nail art using dazzling (look at my face, I'm trying to be sexy here) hahaha


Purple glitter + white 3D flower + shy smile >.<


I really love this nail art, the colors is sharp, unfortunately I didn't have a camera with good quality.


Gradation nail with a sponge and blinged it with glitter top coat.


French nail + rhinestone in 2009 (I borrow my sister digicam, so the photo quality is better)


First time I using Fimo nail art (my nails feel so fresh and juicy) hahaha


Gradation nail using a sponge, and decorated with dazzling too


So sweet!! I really love this nail ^^


In 2010, This is the moment when I finally decided to selling Nail Art materials. This nail art using 3D sticker that I sells in MY SHOP at that time.


I used to be made customized nail art too, but I don't have enough time to made it now, this is several nail art I made for my customers :


The last nail art I created at 2011, already passed 2 years, and I've never made nail art anymore, but I still sell nail art materials in MY SHOP


Twitter Delicious Facebook Digg Stumbleupon Favorites More